Operation Zotac ZBOX as a HTPC (HDMI output & WLAN)
Yo, nard dogs!
This is the story of one brave man buying a HTPC (Zotac ZBOX HD-ID40), installing XBMC and getting it to work with Ubuntu. I’m writing this in English, because
- I believe some other non-Finnish speaking fellows out there might get a kick out of these tips
- I’m interested to see, if writing actually something relevant1 in English has any effect on the amount of visitors
- I get to write kick-ass one-liners such as “Bloody monkey balls”, and “Tame the beast”. Faaan-tastic!
1. The Preface
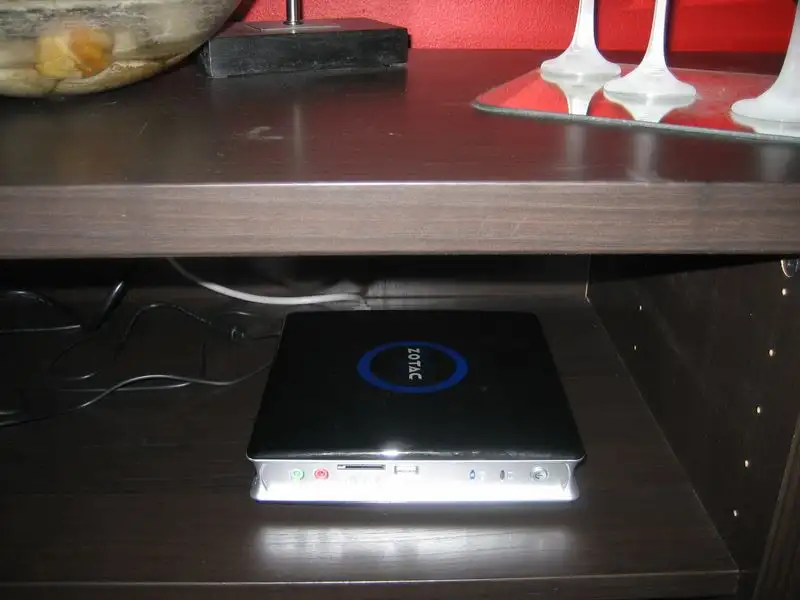
So this is what happened. I was minding my own business, idling at IRC, when someone pasted a link of a Zotac ZBOX HD-ID40 mini-PC. Bloody monkey balls, I had to get one myself in order to still be valued among the coolest people on Earth.
The Zotac did not include any hard-drive or memory, so I had to get those as well. The complete setup was as follows:
- Zotac ZBOX HD-ID40
- Western Digital Scorpio Black 500GB 2.5” 7200rpm
- 2 x Kingston 2GB DDR2 800MHz SODIMM
2. The Setup
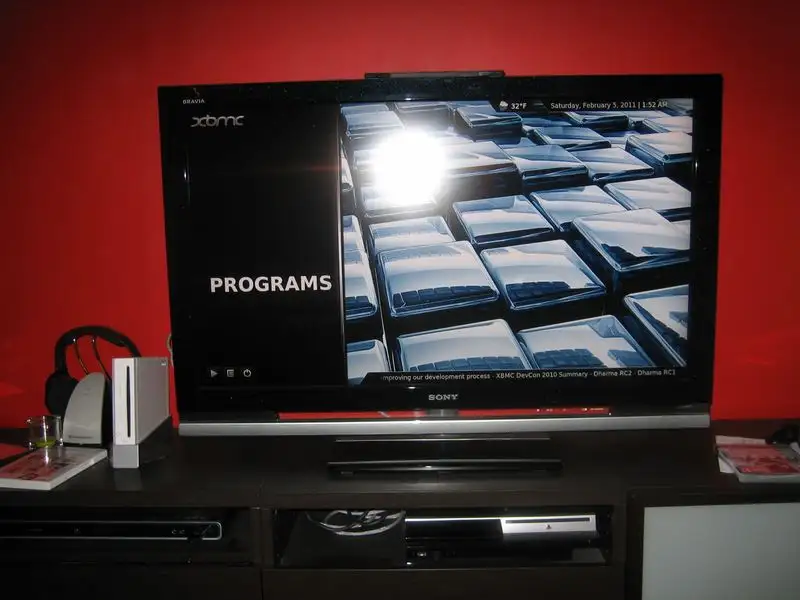
I wanted to build a HTPC setup utilizing WLAN (wasn’t2 too keen on having a network cable running across the living room for about 20 meters), using a HDTV as an output for audio/video (connected with HDMI) and having XBMC as the media center software.
3. The Problems
Well, whadaya know… everything did not work. Main problems were WLAN which got disconnected time after time, and getting the HDMI audio output to work. I won’t get into all the dirty details I had to endure, in order to get it finally working. Instead, here are simply the steps I used, in order to get my setup working.
4. The Solution
Tättädädää!
4.1 Install Ubuntu 10.10
I installed the 32bit Ubuntu 10.10 into the ZBOX using a USB-stick. You know the drill. I chose to automatically update all packages during installation. Not that it should matter.
4.2 Install additional packages
I installed the NVIDIA proprietary drivers from the GNOME UI. Also, I installed the following packages:
sudo apt-get install ubuntu-restricted-extras libvdpau1 nvidia-185-libvdpauThese are required for proper video/GPU support.
4.3 Install XBMC
sudo add-apt-repository ppa:team-xbmc
sudo apt-get install xbmc xbmc-standalone
4.4 Configure audio output through HDMI
The ZBOX does have HDMI audio output capabilities out of the box. But here’s the catch; with Ubuntu they are disabled by default. Which makes sense, if you’re accustomed to trimming your armpits with scissors that are designed for left-handed people EVEN THOUGH you are right-handed! Holy Bat Mobile… Note to self: I’m awesome at metaphors.
Anyway, here’s how to enable them:
- Execute command
sudo alsamixer. Press F6, amd select “HDA NVidia” -card, which offers the HDMI audio output - Press letter M to unmute the channels (text changes from “MM” to “OO”)
- Next, use command
aplay -lto list audio playback devices available- For example, I had – among others – the following device:
card 1: NVidia [HDA NVidia], device 7: NVIDIA HDMI [NVIDIA HDMI]
- For example, I had – among others – the following device:
- Finally, in XBMC audio settings, define custom “audio output device” and “passthrough output device” with the syntax of
plughw:$CARD_ID,$DEVICE_IDthat matches the HDMI audio device gotten from using theaplay -lcommand. For example, I used valueplughw:1,7.
4.5 Compile WLAN drivers
I could not get the WLAN driver to function properly. It periodically got disconnected, which was extremely annoying. Also, even though the chipset supports 802.11n, it connected only at 54Mbps. I googled the problem, and it was caused by the RaLink RT2860 WiFi Network driver. There were many suggestions on how to solve it. Tried many of them, but none of the “simple” tips worked. So finally I was forced to compile the driver by myself. Here are the steps I used to tame the beast:
- Download RT2860PCI/mPCI/CB/PCIe(RT2760/RT2790/RT2860/RT2890) drivers to Linux from http://www.ralinktech.com, and extract it (extraction directory referenced as
$SRC_DIRfrom now on). - Modify
$SRC_DIR/os/linux/config.mkto contain the following parameters (these have value ”n” by default):
HAS_WPA_SUPPLICANT=y
HAS_NATIVE_WPA_SUPPLICANT_SUPPORT=y- Modify
$SRC_DIR/common/cmm_wpa.cby finding the only occurrence of stringMIX_CIPHER_NOTUSEand replacing it with stringWPA_TKIPAES_WPA2_TKIPAES - Compile and install by executing:
sudo make
sudo make install- Replace the driver
# Put the WLAN interface down (also disable auto-connect from GNOME Network Manager, if applicable):
sudo ifconfig wlan0 down
# Remove the original driver from Kernel:
sudo rmmod rt2860sta
# Backup (and move) the original driver
sudo mv /lib/modules/2.6.32-27-generic-pae/kernel/drivers/staging/rt2860/rt2860sta.ko $SOMEWHERE_SAFE
# Note, the above-mentioned path may differ. You can use find to locate it. For example:
sudo find /lib/modules/ -name "rt2860sta.ko"
# Probe and generate all modules:
sudo depmod -a
# Install new compiled driver:
sudo insmod $SRC_DIR/os/linux/rt2860sta.ko
# If everything works, perform the following to stick with the new driver (again, paths may differ):
sudo cp $SRC_DIR/os/linux/rt2860sta.ko /lib/modules/2.6.32-27-generic-pae/kernel/drivers/staging/rt2860/.
sudo vi /etc/modules
# And add the following new line:
rt2860sta
5. Enjoy
Lay back, and enjoy the feeling of true accomplishment. You can’t do this Windows, because the bloody thing tends to work nowadays. Go figure…

1) Debatable, I know
2) Girlfriend ordered told kindly suggested not to…